Maximizing Nature's Bounty
+60172821219
enquiries@suriahelanglui.com
20 Feb 2015

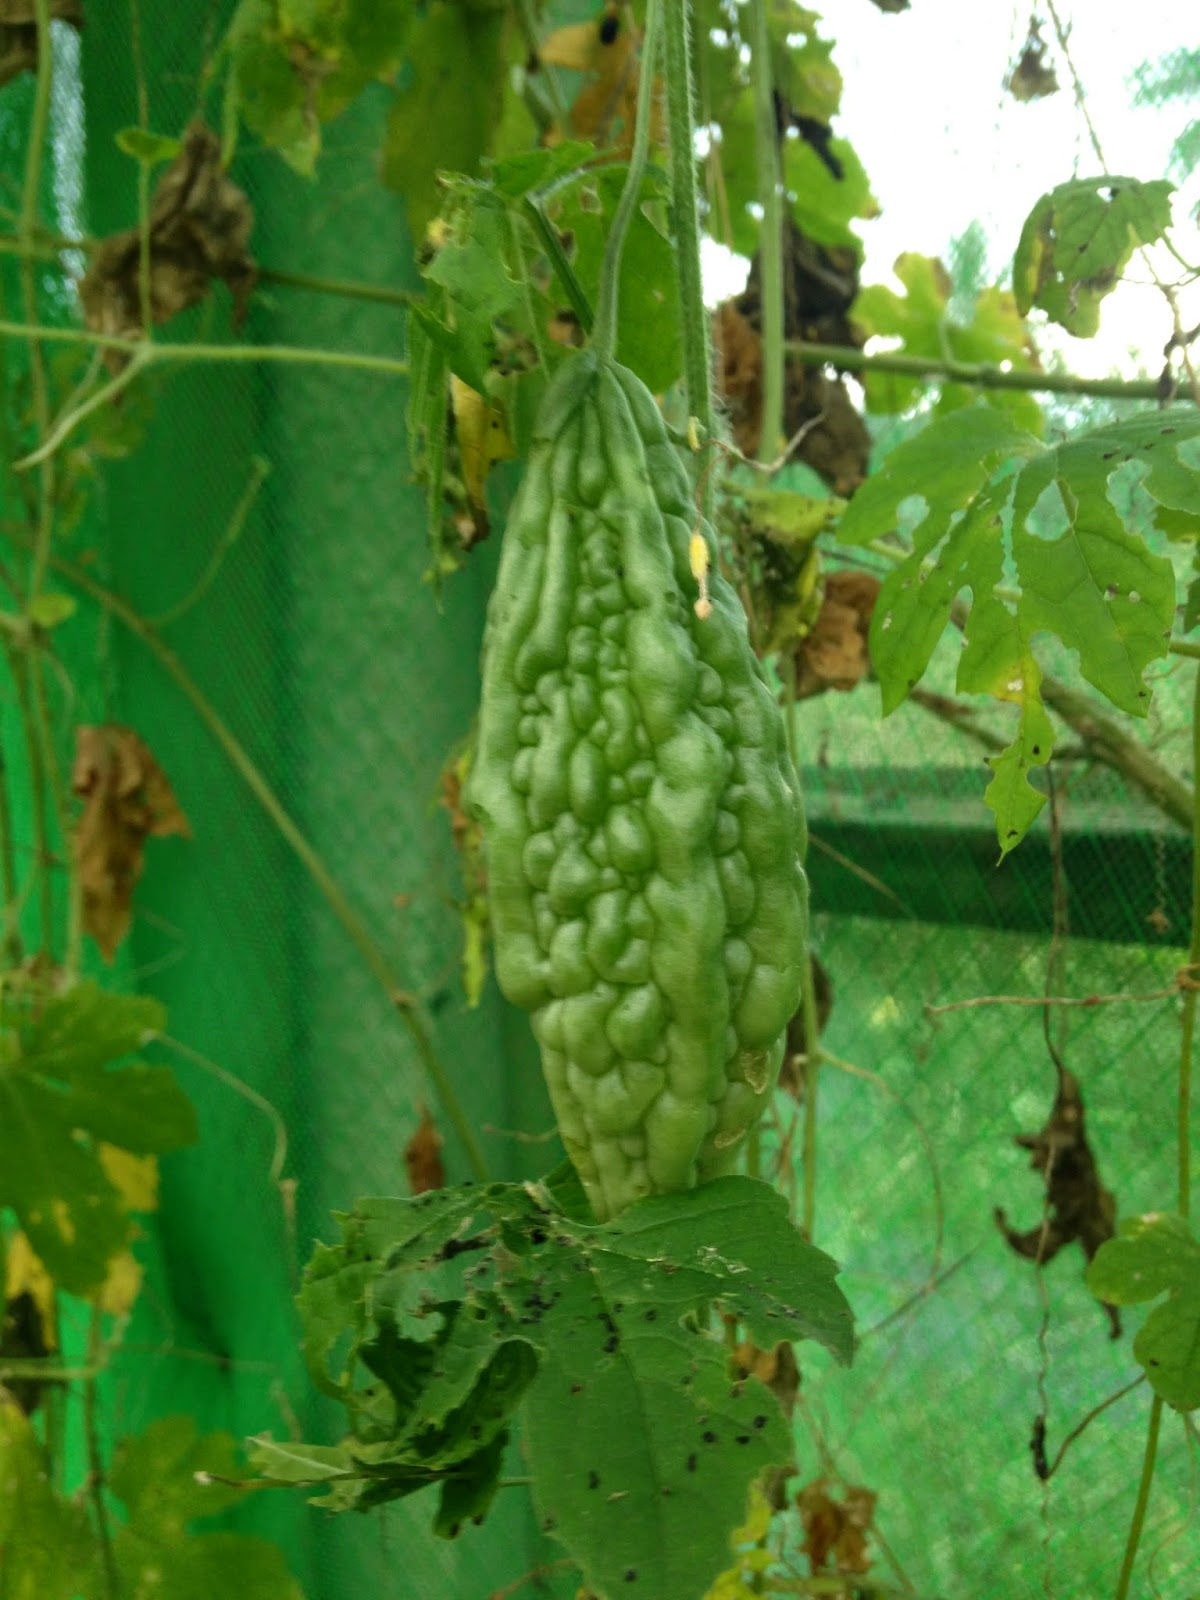
SHL Trellis Adventure Part 2 – Pumpkins

I have tried planting pumpkins with and without trellis and find that the fruits are better when they grow on a trellis.  So December 2014, I seeded various types of pumpkin seeds.  Previously, I had
bought commercial seeds and they didn’t have a good sprouting rate, about 50%.  This time around, I bought 4 different varieties of organic pumpkin  – I prefer speckled pumpkins – and then selected the good-sized, fat seeds and placed them in a colander to dry.  The skinny seeds do not sprout since they do not have enough “meat” to start a plant.  I had tried drying them on newspaper and it ended with them getting stuck on the newspaper.  I store the excess dried seeds wrapped in a newspaper in a dry, cool area.

I sow the seeds in small polybags, about 9 cm across, filled with a soil mixture containing soil,
organic matter and fertilizer and place them in a sunny location.  I water them everyday, taking care not to have the soil too wet and never letting them dry out.  The seeds sprout in 5-7 days.  Two “baby leaves” will appear first before the normal shaped leaves will appear which looks very different from the baby leaves.  After the third normal leaf has appeared, I will transplant them into the ground.  After 1 week, I will fertilise it with about 1 teaspoon of organic fertiliser.  I find that the “trailers” will start to appear after about 2 weeks and the plant will start to climb up the trellis.  By having them grow on a trellis also helps me control the spread of the plant and enables me to easily spot the pumpkins as well as keeping it away from the ground pest and keeping it clean.

This time around, I changed the design of the trellis from the x-shape to a platform-style trellis.  This design helps to support the fruit, which can weigh over 1 kg.  It also provides for a wider area for the plant to creep along and provides me easier access when I need to do plant maintenance.  The plants love full sunlight and the leaves tend to slightly wilt during the peak hot afternoon but will perk-up as the heat eases off.

I will remove any old or yellowed leaves
whenever I spot it as well as any leave that covers-up a flower.  The aim is to provide easy access for the insects to pollinate.  Removing these leaves also encourages growth.  Fruits will also result from pollinated flowers hence it is important to increase the chances of pollination for the flowers.  All 4 types of pumpkin produce a beautiful, bright yellow flower.  Any flower that does not produce a flower will drop off, still in good shape.  I will collect these flowers and cook them – they are edible.

The fruit are ready for harvest when the white area of the speckled skin has turned into an off-white colour with a slight brown tinge.  These pumpkins can be cooked in many ways either as a sweet or savoury dish.  A simple way to prepare pumpkin is to slice them to about 0.5cm thickness, and coat it with olive oil, salt and pepper and grill or bake them.  Simply delicious.  You can do more complex dishes like masak lemak labu dengan udang, pengat labu and even pumpkin pie.  The young pumpkin leaves and shoots can also be used to cook in savoury dishes.  I like to eat the pumpkin for its many benefits including the high content of anti-oxidants, vitamins such as A, C and E, whilst containing no saturated fats or cholesterol.  It is also rich in the vitamin Bs.  All in all, something good to eat 🙂

20 Jan 2015

Tomatoes, oh Tomatoes

One of my favourite fruity vegetables is the tomatoes, organically grown and vine-ripened since I
love them raw with its natural sweetness.  I have planted them many times over the years and with each time, I learn more and more.  This time around, it looks like the yield will be more and the plants are the healthiest.

Tomatoes, whether ripe or not, are a favourite of many animals from worms and caterpillars to birds including chickens.  I have experimented planting them outdoors and in the greenhouse.  Due to the nature of my farm, where birds are free, the outdoor experiment resulted in me just feeding them.  So, now I only plant them in the greenhouse.

I plant them from seeds – it germinates in a few days – in the ground.  The quality of the seed is important for a good quality tree.  From my experiments, I find that unless you obtain vine-ripened tomatoes, the quality of the seed is not good even though it germinates.  If it is not vine-ripened, even if the tomato is left to ripen, the seed doesn’t seem to further mature enough to produce good quality plants.  Most store-bought tomatoes are picked before it fully ripens, probably due to transportation and distribution time delays.  After it has produced 3 or more leaves (after the initial baby leaves which is normally 2 of them), I will transplant most of them into 20 cm diameter polybags, starting them at half full.  Through its life cycle, the roots will appear at the top so by starting half-full, it allows for me to cover the roots with more soil without the need to transplant them.  I do plant some in the ground but this limits the utilisation of the land and I can plant more tomato plants in polybags and have a more controlled setting.

Time to top-up the soil

The soil mixture I use is rich, organic soil – I tend to mix various things and then run my fingers through them to see if it feels right to me.  So, please do not ask what the ratios of soil, organic matter,sand, etc are.  It has to be able to run through my fingers and not lumpy.  I will water immediately upon transplanting, irrespective the time of day.  When I see the roots at the soil surface, I will top up with more soil, covering them.

I fertilise weekly, in small amounts, and also spray with home-made organic fertiliser/pest control spray.  I experimented over the years and find that this spray works best so for now, my experimenting on the tomato spray is done.  It prevents ants, white flies and also other assorted pests. It also seems to improve the health of the plant.  I use vermicompost as the “solid” fertiliser which I use about 1 teaspoon weekly per plant.  Tomatoes require lots of water for nice luscious fruits but not soggy, muddy soil so it is important that the soil contains enough organic matter to hold water and not suffocated the roots with mud-like sludge.  I water them twice a day on hot days, once early morning before 9am and once again in the late afternoon and on cool, rainy days, once in the morning.

The white flies are the most notorious to me followed by the
caterpillar.  The white flies lay eggs at the bottom of the leave and these babies then seem to suck the life out of the leaves, causing them to yellow and wither.  The spray I use addresses this problem and I have to be diligent about spraying it once a week.  In between sprays, I also water spray them off should I notice them.  Since this spray is non-toxic and provides lots of benefits, I have now started spraying them twice a week so I have to continuously prepare more concentrate.  The EM concentrate is made by mixing vegetarian kitchen wastes such as papaya skins and other fruit skins and pulp, tomato skins, vegetable stems, with molasses and fermenting them for 3 months in an air-tight container.  Weekly, I will open the lid of the container to release the gases produced by the fermentation process.  To create the spray, I mix approximately 100ml of the concentrate to 1 litre of water with a flat-teaspoon of Epsom salts.  I also sometime mix in some serai wangi juice to add additional pest deterrent properties.

Caterpillar and what is left of the fruit

The caterpillars can munch their way through lots of leaves and also the fruit, leaving just the skin of the fruit.  It is quite amazing to see them munching their way through.  Whilst butterflies may be beautiful, they are a great pest to this plants and their babies, the caterpillars are monster leave and fruit eaters.  Then we have the ants, which creates like a white cocoon to place their eggs where the babies will then such the sap out of the stem, effectively slowly killing the plant.  I also periodically remove any leaves that have signs of pests or “illness” to prevent it from spreading to the rest of the plant and I also remove old or yellowing leaves.

From my experience, tomato plants require support as it fruits or you will end up with broken stems as it cannot support the weight. I will wind “talk raffia” around the stems to support the stems.  This time around, this is something that I diligently need to do as the plants are producing substantial fruits. Just placing a stake to support the main stem is insufficient, I need to support the fruiting branches also. When planted in a pot and if you would like for it to be free-standing and easy to move around for your landscaping, I find using a T-shaped stake is best as it allows to the main stem to be supported as well as allow you to attaches strings and fine ropes from the top T to the fruiting branches.  From seeding to this point in fruiting, it took about 2 months.

I love watching the fruit turn from green to yellow to orange before finally vine-ripening to a red colour.  Once the fruit turns yellow, it takes a few days before becoming red and then it is at its prime in taste.  Each bunch can contain several tomatoes and they do not all ripen at the same time.  You can use these seeds to start a new generation of plants.  I dry them first and this allow me the option to sow the seeds when I want to.  When picked at its prime, you can store in the refrigerator for at least two weeks without significant degradation of taste and juiciness.

Updates: March 15, 2015

18 Dec 2014

Peria Katak or Balsam Apple

I find this climbing plant to be a very pretty plant, from the leaves to the flowers to the fruit and seeds.  The botanical name is Momordica Charantia and in English it is know as bitter gourd, bitter melon, balsam pear or balsam apple.  These plants are annuals and from my experience, it lasts about 6 months before the quality of the plant and fruit starts to drop.

I am not an avid fan of this fruit-vegetable but it has good therapeutic value that I do try to consume it.  So, to to do that, I have to plant it so I can be confident that it is as natural as possible without all those chemical pesticides and fertilisers since I want to eat it for the health benefits.  I bought a few packets of seeds and managed to get some plants to grow.  The fruits are of different sizes so I do not worry about the sizes.  After all, these are not on growth hormones :).

It takes about 1 week for the seeds to germinate and sprout.  I seed them in small polybags filled with high organic content soil.  Once it has sprouted, I will wait until it has produced more than two leaves and the “climbing” stems has appeared before adding organic fertilisers such as vermicompost or other types of organic fertilisers.  After 1 week, it is transplanted outdoors on beds with stakes.  Since it is a creeper, this can be an addition to your edible landscape at your home by placing it near a trellis so that it can climb its way.  You can also “train” it to grow in the direction you want by placing the shoots in that direction.  It loves the sun and doesn’t do as well in semi-shady areas.

It produces bright yellow flowers with an orange centre.  Not all
flowers will produce the fruit, only pollinated ones.  So, I find that planting a few of these plants close helps increase the rate of cross-pollination.  It is also important to remove the yellowed and old leaves to encourage growth as well as to provide easy access for the insects to the flowers for pollination.  A healthy plant will produce an abundance of foliage which often will hide some of the flowers so I also tend to remove the leaves around the flowers.

I fertilise every 2 weeks with organic fertiliser and ensure it receives sufficient water, either by rainfall or watering it.  We have the blessings of abundant clean water, free or chlorine or other additives and I feel that it makes a difference.  As with many vegetables, drainage is important.  To control pests, we use organic pesticides such as serai wangi spray – home-made because we have planted it for the main purpose of making our own organic pest control.

I have been disappointed with the results from bought packaged seeds so I decided to produce my own,  I allow the fruit to ripen to a bright yellow-orange before I pluck it from the plant.  I will then place it in whole on a shelf and wait for it to burst open on its own, which is normally about a day later.  The individual seeds are coated with a bright red skin which is peeled off to uncover the light brown seed which an interesting “flowery” edge, a very distinctive form and so far the only seed that I have seen that has a pattern around the edges,  The seed should feel firm and not soft indicating that it is mature enough to be planted.  Should you buy seeds, test the firmness of the seed, if it is soft, it will not produce plants or produce weak plants.  To store these seeds, keep them in a dry and cool area and they can last a few months.

In traditional and homeopathic therapy, it is used as a treatment for diabetes.  For Malays, it has long been eaten as ulam with sambal belacan.  It is also a favourite among “juicers”.  Further information in natural medicine can be found in this link >> http://naturalmedicinejournal.com/journal/2012-10/nutrient-profile-bitter-melon-momordica-charantia.

Bitter gourd pods
boiled, drained, no salt
Nutritional value per 100 g (3.5 oz)
Energy 79 kJ (19 kcal)
4.32 g
Sugars 1.95 g
Dietary fiber 2 g
0.18 g
0.84 g
Vitamins
Vitamin A equiv.

(1%)

6 μg

(1%)

68 μg

1323 μg
Thiamine (B1)
(4%)

0.051 mg

Riboflavin (B2)
(4%)

0.053 mg

Niacin (B3)
(2%)

0.28 mg

(4%)

0.193 mg

Vitamin B6
(3%)

0.041 mg

Folate (B9)
(13%)

51 μg

Vitamin C
(40%)

33 mg

Vitamin E
(1%)

0.14 mg

Vitamin K
(5%)

4.8 μg

Trace metals
Calcium
(1%)

9 mg

Iron
(3%)

0.38 mg

Magnesium
(5%)

16 mg

Manganese
(4%)

0.086 mg

Phosphorus
(5%)

36 mg

Potassium
(7%)

319 mg

Sodium
(0%)

6 mg

Zinc
(8%)

0.77 mg

Other constituents
Water 93.95 g

Percentages are roughly approximated usingUS recommendations for adults.
Source: USDA Nutrient Database

Updated 17 February, 2015
11 Dec 2014

Edible or Therapeutic Flowering Landscape Part 1

The basic rule that we have for plants at the farm is that it must be either edible or have therapeutic values and is our botanical heritage.  I love flowers so I find flowering plants that meets the criteria and work on growing and propagating them as well as trying the understand what makes them grow well.  These are all relatively low maintenance so you might want to try to add them to your landscape, if you don’t already have it.
Bunga Kantan (Ginger Torch)
Ruku (Holy Basil)

Lengkuas Kecil (Galanggang)
Selasih Putih (White Basil)

Misai Kucing (Cat’s Whiskers)
Tujuh Bilah

Kunyit (Tumeric)
Kari (Curry)

As I manage to photograph more plants, part 2 will follow.  I look forward to furthering my quest whilst land space permits J
28 Sep 2014

Bananas – Pisang Tanduk

It took me quite some time to find baby plants of the pisang tanduk.  This plant is getting to be rare and the bananas are difficult to find at the markets.  It turns out that my uncle had some and he gave me 10 baby plants.  And so my study of the pisang tanduk begins.

The plant grow to about 6m tall, shorter to many of the other smaller size banana plants.  We planted it in a high organic content soil area.  The banana has a unique shape and is easily the largest banana amongst the many varieties of this plant.  The uniqueness of this banana plant is that it doesn’t have an inflorescence or jantung  like the other banana plants.  It is a big size banana and at the farm, one fruit can weigh 500gm.  It took slightly more than 1 year before we had our first harvest.

This banana has lots of vitamins and minerals so it is an added bonus to the great taste.  Naturally ripened, it has a very sweet with a touch of sourness taste hence is a favorite for banana fritters and a sweet coconut based dessert: pengat pisang amongst banana connoisseurs.  If the fruit was not left to properly mature and ripen, it will not have the sweetness but more of a sour creamy taste and you may be disappointed.

It can also be steamed and eaten with or without a sweet syrup.  However, not many people know of this banana nowadays due to its scarcity.  Mature but unripened bananas are also a favourite for making banana chips or kerepek pisang.  It can also be peeled and sliced and used in savoury dishes like curry. In short, it can be fried, grilled, steamed or boiled – so many options.

I am happy that we have this banana plant species at the farm as it is getting harder and harder to find it at the market.  So, should you ever find good quality pisang tanduk, I hope you will try it and enjoy the tasteful experience.

04 Jun 2013

Tumeric – a totally edible plant

As with many condiments, so does tumeric (Malay name: Kunyit; Botanical Name: Curcuma Longa), it taste better fresh and provides maximum health benefits.  In Malaysia, you can find both fresh tumeric and tumeric powder easily.  Personally, I prefer the fresh tumeric and I find that it doesn’t leave an after-taste more often experienced with turmeric powder and you can be sure that it is pure.  Apart from being used in culinary and traditional medicines, the rhizome is also used to create a natural yellow dye.

The tumeric belongs to the ginger plant family hence it can be propagated from its rhizome.  The first time I planted it, I used store-bought fresh turmeric, selection the ones with the darkest rhizome skin colour to ensure better success in propagation.  In ensuing propagation, I have used the farm-produced rhizomes.

It grows well in a sun and well-drained soil and requires substantial water for good growth.  If there is insufficient rain, then it needs to be watered.  The tumeric rhizome doesn’t grow as well in heavy clay soil.  I find that he best soil mixture for good growth after my experiments at the farm is 50% soil, 30% organic matter and 20% sand.  I fertilise it about once a month.

Each leaf grows on its own stalk.  The mature leaves are best for using in cooking.  It can be harvested as you want to use it without impact to the growing rhizome.  The rhizome has an “orangish” skin and mature rhizomes is almost orange in color on the inside by comparison to young rhizomes are yellowish-white in color.

It is a small plant, measuring under 0.5m.  As such, it can make a good walkway or patio border plant for the home landscape.  It produces a creamy white, with a tinge of green, flower when mature, taking at least 6 months from planted at the farm, and it is at this stage that the rhizomes are ready to be harvested. 

The flower grows on its own stem from the base of the plant.  At the farm, the flower has grown to about 10cm long, with multi-layers of petals.  In creating an edible landscape, this plant is a good option as it is a flowering plant require minimal maintenance.  The beauty of this plant is the whole plant is edible: the leaves, the flowers and the rhizomes.

In Malaysia, both the leaf and the rhizome are used in cooking.  It produces a wonderful flavour that enhancesNo rendang dish is complete without tumeric leaves.  The flower can be eaten as ulam or salad.  The plant produces singular leaves which can grow to be quite long, about 40-50cm long, if it is healthy.

Among the health benefits that have been attributed are:

  1. It is a natural antiseptic and antibacterial agent and is useful in disinfecting cuts and burns.  In traditional medicing a paste is created and applied to cuts and burns.
  2. Has properties that appear to prevent and stop the growth of cancer cells.
  3. In traditional medicine, the juice extracted from the tumeric has been used as a natural liver detoxifier.
  4. A potent natural anti-inflammatory that works well without the side effect, it has been used in natural medicine for treatment for athritis and rheumatoid arthritis.
  5. Used in natural medicine for treatment of psoriasis and other inflammatory skin condition, usually by applying a tumeric poultice.

 For its culinary uses and therapeutic benefits, this plant should be high on your list if you are planning an flowering edible landscape.

Updated: March 15, 2015

08 May 2013

Curry tree (Pokok Kari)

No curry dish is complete without the addition of the leaves from the curry tree (Botanical name : Murraya koenegii ).  This tree is very easy to take care of and the growth can be controlled by frequent pruning.  The pruning also encourages it to form branches hence you can shape this tree.  In the late afternoon, as I walk by it, I always get a whiff of curry.
This tree can grow in sunny to partial shade areas.  Until recently, I didn’t realize that it could produce beautiful white flowers.  The more mature the leaf is, the stronger the flavor of “curry” it has.
Whilst it is most often used as a “spice” for curry dishes, the young shoots are also eaten raw as ulam. 
Some of the therapeutic benefits reported are :

  • Helps to relieve the pain caused by kidney stones. They also cleanse the urinary tract, preventing bacterial infections.
  • The leaf has tonic properties. It can be mixed with honey or buttermilk to create an herbal drink to strengthen the digestive system. It can also help treat dysentery and diarrhea.
  • It can be applied externally on the skin as treatment for minor skin infections and eruptions.
  • The juice of curry leaves can be used as treatment for eye disorders and to prevent cataracts.
  • The root and bark of the curry plant have medicinal properties. In traditional medicine, the leaves are ground into powder and used to treat diabetes.
  • The fruit of the curry plant is also edible. It can be used for the effective relief and treatment of poisonous stings and bites.

As this tree is easy to grow and produces lots of leaves, you only need to plant one tree in your garden and with it leaves and white flowers, can be a beautiful and edible addition to your landscape.

12 Mar 2013

Eggplants – So many varieties

Before I became a farmer, I was vaguely aware of the a couple varieties of the eggplant.  Now, I find that there are so many varieties and called a few names – eggplant, brinjals, aubergine and guinea squash – and is from the plant family Solanaceae.  As with the varied names, there are also many sizes, shapes and colors.  This plant is a perennial but is often cultivated as an annual in locations which have a climate other than tropical.

This plant is propagated from seeds.The plant can grow quite tall but can be controlled by selective pruning to help shape it.  It produces small purple or white flowers with a yellow stamen.  A healthy plant can produce lots of flowers, beautiful to look at so you might want to consider this for your home garden, both as a landscape feature and food source.  At the farm, it is watered regularly and fornightly organic fertilizing and this seems to result in good quality and quantity of flowers and fruit.  I also water them at least once a week with water from the fish pond so that it can receive the various minerals and nutrients available from this water.  Be careful with terung pipit though as it does have sharp thorns on its branches and stems.

It is difficult to spot the difference between the leaves so I wait until the plant produces the fruit although I can distinguish a couple of the varieties.  The fruits produce can weigh the plant stems down so it is important to stake them to prevent the plant from toppling or the fruits from laying on the gound which can damage it.  At the farm, I use a 1″ pvc pipe of at least 1m long and then I thread “rafia” string along the branches to provide support.  I find that by threading the string, it prevents damage being done to the branches and provides balanced support.

Some varieties taste better than others eaten raw.  Other ways for preparing it include using it in curries, baked either with olive oil or with a cheese topping, dipped in batter and fried, sauteed with a seasoning of your choice, stuffed with cheese, seafood, breadcrumb mixture or whatever you fancy – the options are limited to your culinary imagination.  A special quality of terung pipit is it is often used locally is as a condiment to reduce the bitterness of papaya shoots.

There are probably more varieties so I look forward to more discoveries….

09 Feb 2013

Toona Sureni – long term plan

It is always amazing what you learn from people who become a part of your life.  In this case, I was introduced to Suren leaves or as people from Kerinci call it: daun suhin or in Malay – daun surian, as a condiment you use in cooking rebung and young bananas as well as other savoury dishes.  It adds a slightly sour taste to the dish.
It’s botanical name is toona sureni or known in English as Indonesian Mahogany.  I am not sure if it can be easily found in Malaysia and the ones that I know of have been brought over by people originating from Kerinci where it is widely planted.

It is planted from tiny seeds that was sprinkled over the ground and lightly covered with soil.  When it was about 10cm tall, we started to transplant them to various locations on the farm.  Depending on the location of the plant, some died, some grew faster than the others.  In general, I found that if it was planted in the ground that had a 50% clay composition it would grow slower that in ground that had a lower clay composition but at the same time had at least 30% organic matter.

The tree produces distinctive stems of leaves from the main trunk and grows straight without any branches.  In the 2 years that I have had this tree seeded and planted, the tallest tree is now over 8m tall and the shortest is about 2m tall.   Traditionally, it has been used as natural insect repellent including for mosquitoes.  The natural aroma from the leaves and tree bark repels these insects.  I have noticed that the immediate area surrounding the location of the tree has fewer insects, including mosquitoes and gnats.

The young leaf shoots are red in color which turns into a dark green as it matures.  Before the leave fully stem of leaves fully matures – where there are still leaves that have a red tinge to it – is when it is used as a condiment.  Hence I categorize this tree as a tree that falls into the edible landscape variety.

This tree can grow to 30m tall with a trunk diameter of up to 2m – this of course will take years.  You can say that this will be for the next generation which by then should make this into a valuable tree.  The lumber produced is prized in the production of quality wooden furniture and window frames.   I am looking forward to observing the growth of this tree and what its fruit will look like.  So if you are selecting a tree to add to your landscape, you might want to consider this tree with its multi-uses.

05 Feb 2013

SHL Trellis Plants Adventure – Part 1

I have always had a fascination of plants growing on a trellis or arbor ever since I saw in real-life grapes growing on an arbor in California.  Somehow, I do not think that grapes will grow well at the farm so I began to experiment with different plants.  There is a multitude of choices so I selected based on what I enjoy eating.

To start with, I selected long green beans and french beans – both versatile vegetables.  Both these plants produce lilac flowers so I wonder if these types of beans produce lilac or purple flowers.  I also noticed that the angle bean (kacang kelisa ) also produces purple flowers.  Both the long beans and green beans does well planted in polybag, just watch the soil level against the root growth.  Should the roots become visible, it is essential to top-up with additional soil to ensure the plant continues to produce good quality and lots of beans.  Periodic removal of mature leaves will encourage production of flowers and new growth.  These two plants share a trellis well as the trailing vines have similar light texture.

Baby cucumbers are also a favorite, with its crisp, sweet, fresh taste.  They also produce nice, small  yellow flowers.  These plant are really sensitive to the water availability as well as vulnerable to insects which tend to eat the leaves as opposed to my other trellis plants.  The leave have a coarse surface texture and can stick to your clothes easily.  I spray them at least once a week with my serai wangi mix.

The bottle gourd or labu air produces medium-sized white flowers  with a yellow center, which unlike most of the other flowers, have petals that open at dusk and through the evening and closes when the sun rises. 

The leaves are similar to the loofah/luffa or petola plant.  The difference between the two, the loofah plant produces yellow flowers and similar to the bottle gourd, it opens at dusk and closes at sunrise.  The bottle gourd, loofah and baby cucumber can share the same trellis as they have heavier trellis so they can support each other.  It is best not to plant these plants on the same trellis as the long bean or green beans as they can weigh down the vines of the beans,

There are several varieties of bitter gourd and they produce white flowers.  The leaves of the bitter gourd appear to be delicate and has a distinctive shape, with lots of details – rather beautiful.  It is also soft to the touch.  It’s tendrils are also delicate and break easily.  The bitter gourd can share the same trellis as the green beans due to their similar lighter vines.

Most times you will find pumpkin grown on the ground, often referred to as a pumpkin patch.  However, these plants can be grown on a trellis, albeit with a little help from “strings” to help support the plant.  Personnally, I prefer the green/yellow speckled pumpkin which you find at supermarkets often labelled as Japanese pumpkins.  It is best to plant the pumpkins on their own trellist as they have heavy vines and much larger leaves.

All these plants are planted in large polybags to ease maintenance as well as ensure maximum fertilization as the fertilizer is placed within the polybag and no wastage.  I can just focus on the weeds that grown in the polybags and use a weed-cutter in the areas surrounding the polybags.  When the plants die off, I just remove the polybag from the trellis and replace with another. 

Being in polybags also mean that I have to monitor the moisture level of the soil more than if it was planted in the ground but the trade-off is worthwhile since it makes preventing it from being overcrowded by weeds much easier.  With all the various colors of flowers and its fancy-shaped leaves, it presents a beautiful trellis to the eyes.  My next addition to the trellises will be honey dew and cantaloupes.  And so the adventure continues……